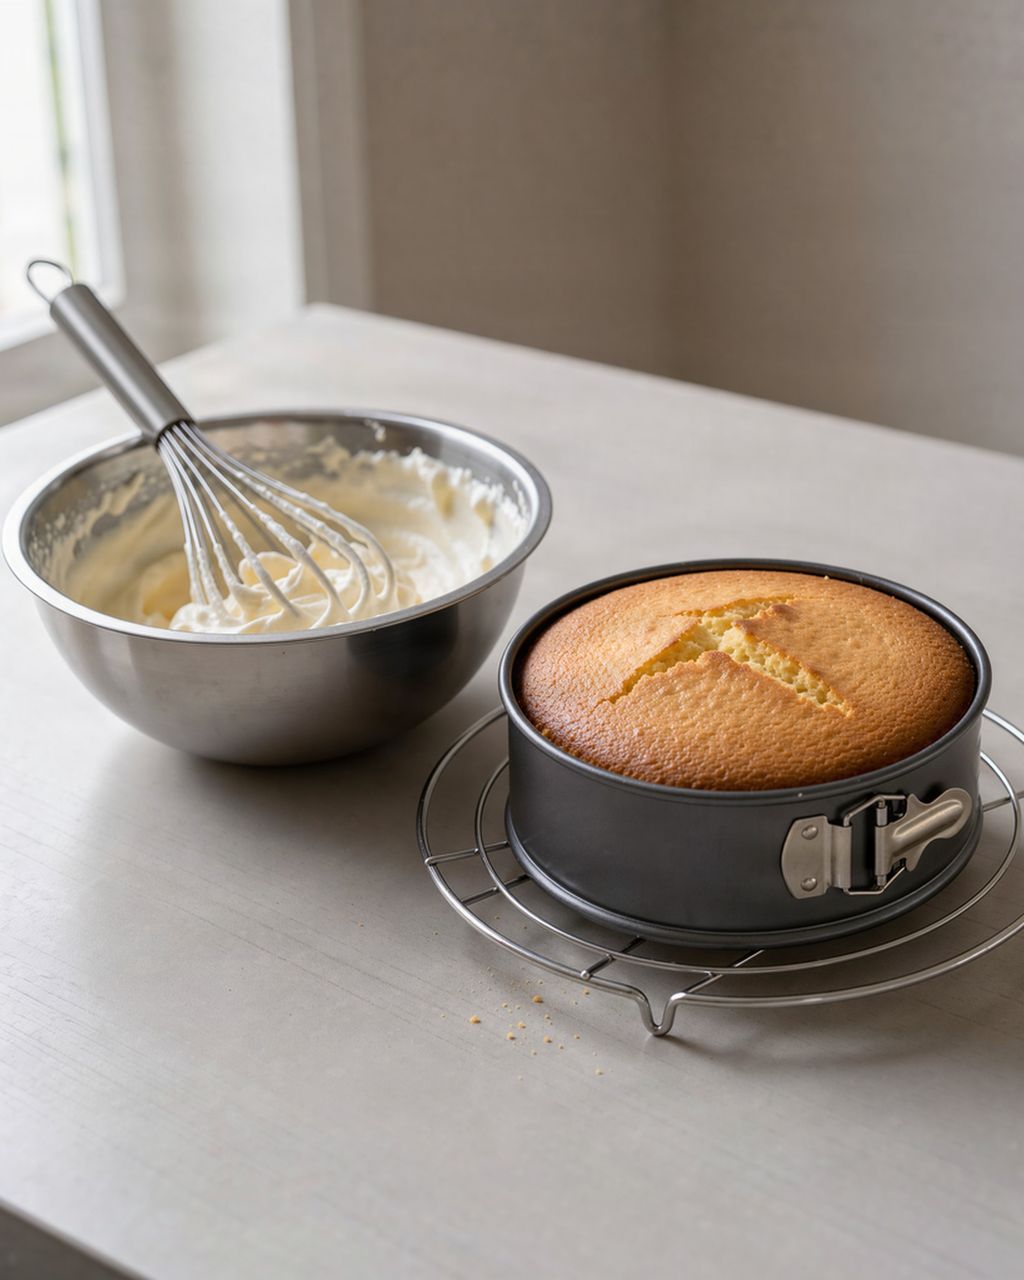
Light and airy génoise sponge cake
Pão de Ló Recipe: Traditional Portuguese Sponge Cake, Step by Step
Updated Oct 24, 2026
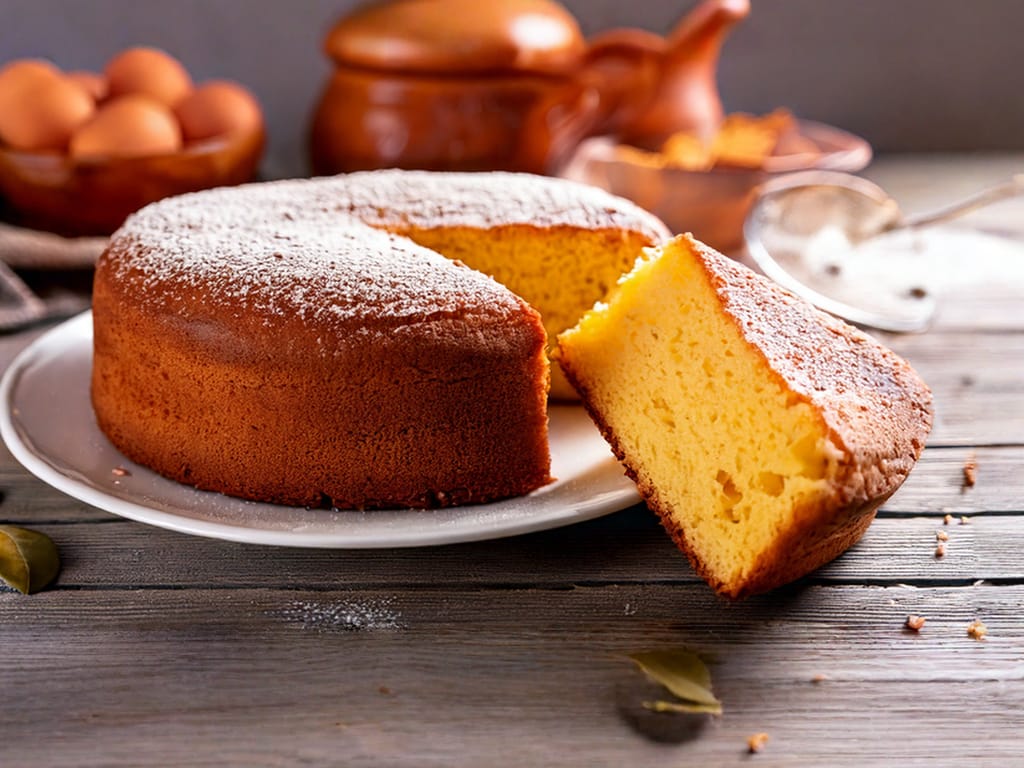
Pão de Ló is a traditional Portuguese sponge cake made with just three ingredients – eggs, sugar and flour – and baked with no baking powder or yeast. Its volume comes entirely from the air whisked into the eggs, which is why it's so light and tender that it melts in your mouth. For a 24 cm (9½-inch) round tin you need 6 eggs, 200 g sugar and 150 g flour, and about 25–30 minutes at 180 °C (350 °F). Pão de Ló has been documented in Portugal since the 16th century, and it was made famous by convents, where nuns baked it for generations. It's still made today in many regional styles – from fully baked through to deliberately creamy in the middle. We'll show you how to make it at home: quantities for different tin sizes, how to tell when it's done, why it sometimes sinks and how to store it.
Pão de Ló is a Portuguese sponge cake made from three basic ingredients – eggs, sugar and flour – with no baking powder or yeast. Its lightness doesn't come from a chemical reaction but from a mechanical one: long whisking works air into the eggs, and that air expands in the oven and lifts the batter.
It differs from an ordinary Czech sponge in that the eggs are whisked whole (the whites aren't separated), there's usually more sugar than flour, and traditional regional versions are much richer in yolks. The result is moister, yellower and more "eggy".
The first written mention of pão de ló dates from the middle of the 16th century. Convent kitchens made it famous; the Alfeizerão version is linked above all with the Santa Maria de Cós convent. The nuns baked desserts for religious feast days, and after the convents were dissolved in the 19th century, the recipes spread among local people.
Thanks to Portuguese sailors, the sponge travelled as far as Japan, where it became the still-popular castella (kasutera) – its name points back to the older Portuguese name pão de Castela.
Recipe of the week, one tip that saves you time and one deal from the shop. Unsubscribe in one click.
The next issue goes out on Thursday, November 26.
A classic Pão de Ló takes 6 eggs, 200 g sugar and 150 g plain (all-purpose) flour, and bakes in about 25–30 minutes in an oven heated to 180 °C (350 °F), top and bottom heat, in a 24 cm tin. The whole trick is whisking the eggs into a thick foam and folding in the flour gently so the batter doesn't lose its air.
For a 24 cm (9½-inch) tin of Pão de Ló you need 6 eggs, 200 g sugar and 150 g plain (all-purpose) flour – plus kitchen scales, because with this ratio even a small deviation matters.
6 large eggs (room temperature)
200 g granulated sugar
150 g plain (all-purpose) wheat flour
a pinch of salt
grated zest of ½ organic lemon (optional)
a round tin, 24 cm in diameter, and baking parchment
You make Pão de Ló in six steps: preheat the oven and line the tin, whisk the eggs with the sugar, fold in the flour, pour the batter into the tin, bake, and cool in the paper.
Preheat the oven to 180 °C (350 °F), top and bottom heat, no fan, at least 20 minutes ahead, and line the tin with baking parchment – base and sides. Don't grease the sides; the foam "climbs" up the paper.
Whisk the eggs, sugar and a pinch of salt with a whisk or mixer for 8–10 minutes, until you have a pale, fluffy foam that has tripled in volume and falls from the whisk in a continuous "ribbon" that holds on the surface for a few seconds.
Stir in the lemon zest. Sift in the flour in 3 batches, folding it in with a spatula in circular motions from the bottom up – as few strokes as possible so the foam doesn't collapse, but enough that no lumps of flour are left at the bottom.
Pour the batter straight into the tin and just lightly smooth the top. Don't let it stand – the foam will start to thin out.
Bake for 25–30 minutes. A fully baked sponge is golden and springy, and a skewer inserted in the centre comes out clean. For a creamy, barely set centre in the Ovar style, shorten the time to 15–22 minutes so the skewer stays moist (details below).
Leave it to rest in the tin for 5–10 minutes, then turn it out onto a rack and let it cool in the paper – this keeps the sponge from drying out as much. Serve simply dusted with icing sugar.
Keep the same ratio for every tin size – roughly 1 egg : 33 g sugar : 25 g flour – and adjust the time and temperature to the depth of the batter. For a fully baked Pão de Ló:
20 cm tin: 4 eggs, 135 g sugar, 100 g flour – 180 °C (350 °F), 22–26 minutes.
24 cm tin: 6 eggs, 200 g sugar, 150 g flour – 180 °C (350 °F), 25–30 minutes.
26 cm tin: 7 eggs, 235 g sugar, 175 g flour – 175 °C (345 °F), 30–35 minutes.
22–24 cm tube tin (about 2.5 l): 8 eggs, 270 g sugar, 200 g flour – 170 °C (340 °F), 40–45 minutes. Grease the tin thinly and dust it with flour; the tube can't be lined with paper.
A deeper, narrower layer of batter needs a lower temperature and a longer time, otherwise the top darkens before the centre is baked. The batter should fill the tin no more than ⅔ of the way – in the oven it rises by roughly another third. A tin with higher sides (at least 7 cm) works best for Pão de Ló.
You can tell a fully baked Pão de Ló by three signs together: a skewer inserted in the centre comes out clean, the surface springs back when lightly pressed with a finger, and the sponge starts to pull away from the edge of the tin. The crust is an even golden colour and doesn't sizzle.
Skewer – insert it only once the minimum time is up, not before. Moist crumbs mean another 3–5 minutes.
Springy surface – a dent from your finger fills back in right away. If it stays, the centre isn't set yet.
Pulling away from the edge – a narrow gap of around 2–3 mm appears between the sponge and the paper.
The creamy version in the style of Ovar and Alfeizerão is baked differently: briefly and at a rather higher temperature, so the crust forms before the centre has time to set. At home, in a 24 cm tin, allow 180–200 °C (350–400 °F) and 15–22 minutes (the Ovar specification gives 140–200 °C). It's done when the edges are firm and risen, the top is golden with a thin crust, but the centre still wobbles slightly when you shake the tin and a skewer comes out wet. After cooling, the centre sinks a little and the crust cracks – with this version, that's fine. A creamier centre comes mainly from a batter with a higher proportion of yolks, which is what the traditional Ovar recipes use; with whole eggs the centre will be more moist than runny.

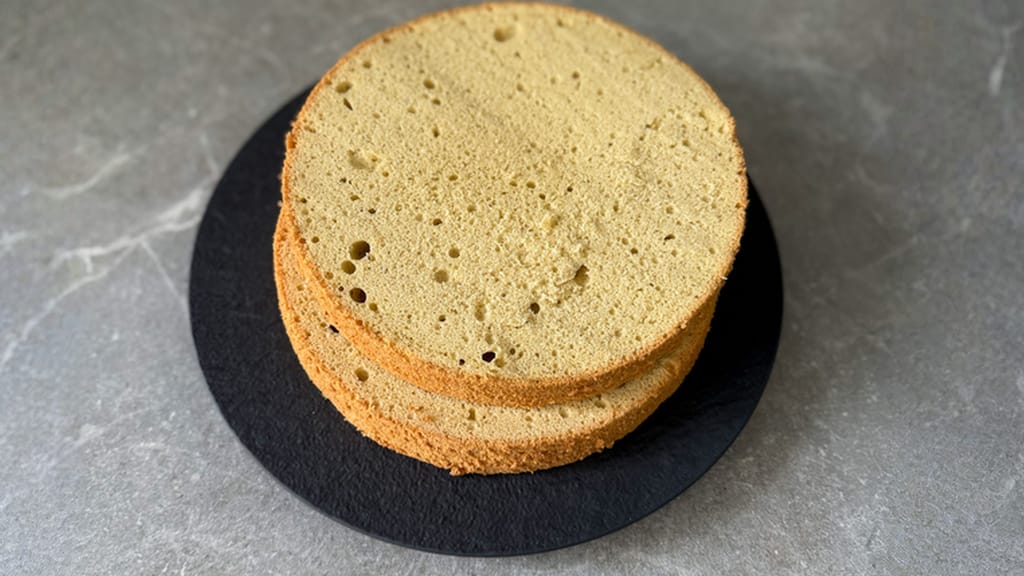
Light and airy génoise sponge cake
A light Génoise sponge base – another sponge that relies only on whisked-in air, with no raising agent
Pão de Ló needs no baking powder or yeast, because it's lifted by the air whisked into the eggs. Long whisking creates a stable foam full of tiny bubbles; in the oven, steam expands inside them and increases the volume, while the egg protein sets and fixes the structure in place.
That's why it's so important to whisk the eggs thoroughly and then fold in the flour as gently as possible. Every unnecessary stir breaks the bubbles – and the fluffiness goes with them. The yolks also give the sponge its colour, moistness and typical flavour, which is why traditional versions are rich in yolks. Egg temperature helps too: room-temperature eggs (around 20 °C / 68 °F) whisk up to a greater volume than cold ones straight from the fridge.
We go into detail on how long to whisk and why the ratio of ingredients matters so much in our article sponge batter: the ratio of eggs, sugar and flour and how long to whisk.
Almost every flaw in Pão de Ló – sinking, density or a rubbery layer – comes down to air lost from the foam or an inaccurate oven temperature. Find your problem, its cause and the fix:
Sank in the middle after coming out – cause: the centre wasn't baked through, the oven was running cooler than it says, or you opened it too soon. Fix: bake until the surface springs back and a skewer comes out clean, keep the door shut for the first 20 minutes and check through the glass, and let the sponge cool for 5 minutes in the oven with the door ajar. Foam sponges are sensitive to the 10–20 °C error that ordinary ovens often have – check the real temperature with an Patisse oven thermometer and adjust the setting accordingly.
Sank in the oven – cause: the temperature was too high (the batter shoots up and has no time to firm up) or the foam was underwhisked. Fix: lower the temperature by 10 °C and whisk to a firm ribbon.
Dense and low – cause: too little whisking, cold eggs, flour mixed in with a whisk, or batter that waited before baking. Fix: room-temperature eggs, whisk for 8–10 minutes, use only a spatula once the flour goes in, and get it in the oven right away.
A rubbery, damp layer at the bottom – cause: the foam separated before baking and liquid egg sank to the bottom, or unmixed flour was left under the foam. Fix: whisk longer (the ribbon must hold on the surface for a moment), add the flour in batches and always scoop from the very bottom with the spatula; with the fully baked version, the layer often shows up when it's underbaked too – add 3–5 minutes.
Didn't rise up the sides, has a low "hump" – cause: the sides of the tin were greased, so the foam slid down. Fix: simply line a round tin with paper, base and sides.
Dark top, raw centre – cause: the temperature is too high for a deep tin. Fix: lower it by 10–20 °C and extend the time, or loosely cover the top with paper after 20 minutes.
Dry and crumbly – cause: overbaking, too little sugar, or ingredients measured "by eye". Fix: weigh on kitchen scales, not with cups, stick to the ratio and start checking with a skewer at the lower end of the time range.
You'll find more causes, including for other sponges, in our article a sunken sponge cake base: 7 causes and how to prevent it.
The three best-known Portuguese versions differ mainly in how far they're baked, the proportion of yolks and the shape: Ovar has a creamy, barely set centre, Alfeizerão is moist and flavoured with aguardente (a Portuguese spirit), and Felgueiras (Pão de Ló de Margaride) is pale, delicate and richer in yolks. Each region makes a completely different dessert from the same base.
Pão de Ló de Ovar is a deliberately creamy sponge with a moist, barely set centre. Producers in Ovar bake according to the protected-designation specification at 140–200 °C for roughly 50 minutes to 2 hours, depending on the size of the cake – at home, in a smaller tin, it goes much faster. The batter relies mainly on yolks, has a strongly yellow colour and a very thin crust that cracks as it cools. It's traditionally baked in terracotta dishes lined with paper, in which it's also sold, and since 2016 it has had Protected Geographical Indication (PGI) status.
Alfeizerão became famous for its moist, underbaked centre, which sinks slightly into a dip after baking. According to legend, the sponge was served to King Carlos I underbaked by mistake, but he liked it – and the "mistake" became the recipe. Here the batter traditionally includes aguardente, and it's baked briefly at a higher temperature, usually around 200 °C (400 °F).
Pão de Ló de Margaride from Felgueiras has more yolks and a silky-fine texture, often made in a ring shape. According to tradition, the pastry cook Clara Maria created the recipe around 1730; in 1888 the bakery run by her successors became a supplier to the royal court. It's served mainly on holidays and festive occasions.
Yes – Pão de Ló is one of the most rewarding cakes to adapt for gluten-free baking, because it contains little flour and the structure is carried mainly by the eggs. Replace the wheat flour with the same weight of a fine gluten-free baking blend, or with a mix of 50% fine rice flour and 50% cornstarch or potato starch.
No xanthan gum needed – gluten doesn't hold the structure here; the whisked eggs do.
Sift twice – gluten-free blends tend to clump, and the lumps are hard to mix into the foam.
Expect a more delicate texture – the sponge is often more fragile and dries out faster, so eat it within 2 days.
For coeliacs – use only certified gluten-free ingredients and clean utensils with no flour residue.
A fully baked Pão de Ló keeps for 2–3 days at room temperature if you leave it in its paper and seal it in a tin or wrap it in cling film. Ideally eat the creamy version the same day, and put any leftovers in the fridge (at 4 °C / 39 °F or below) and use them by the next day – because of the underbaked eggs, don't leave it standing in a warm place.
Fridge – a fully baked sponge tends to dry out there, so use it only in summer or for the creamy version.
Freezer – freeze a fully baked Pão de Ló completely cooled, wrapped tightly in cling film and a bag; it keeps for about 1–2 months. It's also handy to freeze it in pieces.
Thawing – leave it in its wrapping for 2–3 hours at room temperature so the condensation stays on the film, not on the sponge.
Don't freeze the creamy version – after thawing, the runny centre turns grainy and loses its texture.
Don't throw away a stale sponge: drizzle it with syrup or liqueur and use it in dessert cups.
Pão de Ló is traditionally served on its own, simply dusted with icing sugar, to let its delicacy shine. If you'd like something more, there are a few tried-and-tested pairings:
Whipped cream – creamy cream makes a lovely contrast with the lightness of the sponge.
Fresh fruit – strawberries, raspberries or blueberries balance the sweetness with their tartness; mango or kiwi work for an exotic twist.
A dusting of cocoa or icing sugar – a quick decoration for a festive table.
As for drinks, in Portugal it's served with a light, slightly sparkling Vinho Verde with citrus notes. For a non-alcoholic option, espresso or Earl Grey tea suit it well – both bring out the dessert's delicate flavour.
If Portuguese baking has got you hooked, carry on with the Portuguese almond cake bolo de amêndoa or traditional Portuguese biscoitos – both go as well with coffee as Pão de Ló does.

A creamy Pão de Ló centre contains eggs that aren't fully cooked, so it isn't recommended for young children, pregnant women, older adults or people with weakened immunity. For these groups, use pasteurised eggs or bake the sponge all the way through, until a skewer comes out clean. Even healthy adults should use only fresh, properly refrigerated eggs, eat the creamy version the same day and keep any leftovers in the fridge.
A stand mixer makes the job much easier, since the eggs need to be whisked for 8–10 minutes into a thick foam, but it isn't essential. Traditionally the sponge was whisked by hand for an hour or more, so making it by hand works – just allow more time and whisk the foam thoroughly. A hand mixer can do the same job in 12–15 minutes.
You can't make a true Pão de Ló without eggs, because its entire volume and structure depend on whisked eggs. The closest you'll get is with aquafaba (the liquid from a can of chickpeas), but the result will be denser, less airy and different in flavour – more a different cake than Pão de Ló.
Pão de Ló is whisked from whole eggs with sugar, whereas Czech sponge is often made with separately whipped egg whites. Pão de Ló also has more sugar relative to flour, and traditional versions use more yolks, so it's moister, yellower and more distinctly eggy. It's usually eaten on its own rather than layered with cream.
Don't grease a round Pão de Ló tin – line the base and sides with baking parchment instead. The foam grips the paper and climbs, but it would slide down greasy sides. In Portugal the sponge is even served in its paper. The exception is a tube (Bundt-style) tin, which you should grease thinly and dust with flour.
One recipe worth heating the oven for, one tip, and one deal from the shop. Nothing else.