Egg spread – easy and incredibly good
Natural Egg Dyeing: How to Get Vivid Colours Without Chemicals

Updated Jul 19, 2026
You can dye eggs naturally with what's already in your kitchen cupboard: onion skins give shades from orange to rusty brown, turmeric produces a rich yellow, beetroot turns eggs pink, and red cabbage delivers a surprising blue. No chemicals needed — just vegetables, spices and a splash of vinegar. This guide covers which ingredient produces which colour, how to brew a dye bath from it, and — most importantly — how to achieve deep, vivid shades rather than a faint hint of colour, plus tricks for patterns and for keeping your eggs looking good and staying safe to eat for as long as possible.
The most reliable natural dyes and the shades they produce: onion skins (orange to reddish-brown), turmeric (rich yellow), beetroot (pink to red), red cabbage (blue to turquoise), dried hibiscus (grey-blue to lavender), spinach or parsley (soft green), and strong black tea (beige to brown). You can fine-tune the shade and intensity by adjusting the amount of ingredient and the soaking time.
Onion skins → orange to deep reddish-brown
Turmeric → bright yellow
Beetroot → pink to deep pink
Red cabbage → blue to turquoise
Dried hibiscus → grey-blue to lavender
Spinach, parsley, nettle → soft green
Strong black tea → warm beige to brown
Onion skins are the most reliable natural dye — they colour deeply and almost never fail. Simmer the skins from 5–6 yellow onions in a litre of water for about 30 minutes; the more skins you use, the darker the result, ranging from bright orange to deep reddish-brown. The colour comes from yellow flavonoids (mainly quercetin) stored in the skins. Either place the eggs in the cooled dye bath for several hours or overnight, or simmer them directly in the bath for 10–15 minutes — the warm bath holds colour better and dyes more evenly.

Turmeric gives a rich yellow in just a few minutes. Simmer three tablespoons of ground turmeric in a litre of water for 10–15 minutes, add a tablespoon of vinegar, and add the eggs. The colour comes from curcumin — the same pigment that stains sauces and fingers yellow, so work with gloves on and protect your worktop, as the stains are hard to remove. Combine it with beetroot for orange, or layer it over a blue cabbage bath for green.
Beetroot produces pink to deep pink rather than a truly vivid red — its betalain pigment bonds more weakly to calcium-rich shells than other dyes, which is why so many people end up with only pale pink eggs. Simmer two grated beetroots in a litre of water with a tablespoon of vinegar, strain, and leave the eggs in the bath overnight if you like. For a deeper tone, soak the eggs for a long time in a cold bath — heat actually damages betalain pigments.
Red cabbage produces the most surprising colour of all: a purple dye bath that turns eggs blue to turquoise. This is thanks to anthocyanin, a pigment that shifts shade depending on pH — leaning purple in acidic conditions, and blue on the more alkaline, calcium-rich eggshell. Simmer half a chopped head of cabbage in a litre of water for 20–30 minutes, strain, add a little vinegar, and soak the eggs for several hours. Hardly anyone expects blue from cabbage, yet it's the most rewarding shade in the whole palette.
Dried hibiscus (even steeped from a fruit tea bag) gives grey-blue to lavender, spinach, parsley or nettle give a soft green, and strong black tea gives a warm beige to brown. The method is the same for all of them: simmer the ingredient, strain, add vinegar, and let the eggs soak. Blueberries promise a blue-purple shade but colour unreliably and tend to look blotchy — for a clean blue, reach for red cabbage instead.
How the soaking method plays out matters more for colour intensity than the ingredient itself. A warm bath (boiling the eggs directly in the dye) colours quickly, deeply and evenly; a cold bath (a cooled dye bath the eggs sit in for hours) gives softer, more pastel tones, but preserves pigments that heat would otherwise destroy.
A warm bath works best for onion, turmeric, cabbage and tea. Place a raw egg in the cold dye bath, bring it to a boil, simmer for 10–15 minutes, then let it cool down right there in the bath.
A cold bath is essential for beetroot and other delicate pigments. Hard-boil the egg first, then submerge it in the cooled dye bath and leave it in the fridge, even overnight.
The golden rule: the longer the egg sits in the bath, the deeper the colour. For maximum intensity, leave it in the fridge overnight.
Natural dyeing always follows the same four steps: brew the dye bath, add vinegar, degrease the eggs, and let them sit in the bath long enough.
Dye bath: cover the ingredient with about a litre of water and simmer (30 minutes for onion skins and cabbage, 10–15 minutes for turmeric, up to 45 minutes for beetroot), then strain through a fine sieve or cloth.
Fixing: stir 1–2 tablespoons of vinegar per litre into the strained bath. Vinegar acidifies the bath and helps the pigment bond to the shell; a pinch of salt helps dissolve the dye.
Degreasing: wipe the shell with vinegar or lemon before dyeing. Grease and traces of soap repel the dye — that's exactly why pale patches show up on eggs.
Dyeing: add the eggs and let them sit — 10–15 minutes at a simmer for a warm bath, hours to overnight for a cold one. Once removed, let them dry on a rack and avoid wiping them while the colour is still fresh.
Four things push up the intensity of a natural dye: plenty of the ingredient, little water, enough vinegar, and a long time in the bath.
Concentrated dye bath: more skins or cabbage with less water means a darker colour. Don't dilute the bath.
White eggs instead of brown: shades really pop on white shells, while brown shells mute every colour.
Vinegar and time: 1–2 tablespoons of vinegar per litre and an overnight soak in the fridge make the biggest difference.
Layering colours: let the egg dry, then dip it a second time — yellow followed by blue gives green, yellow followed by beetroot gives orange.
A final shine: rub dry eggs gently with a drop of oil or a bit of bacon fat or butter. This deepens the colour and gives the shell a nice sheen.
You can create patterns on naturally dyed eggs using four techniques: leaf prints under stocking netting, wax drawing, paper cut-outs, and marbling in onion skins. All four work with any natural dye bath.
The simplest pattern of all. Press a fresh leaf with a striking shape (parsley, fern, dill) onto the egg and hold it firmly in place with a scrap of old stocking or netting tied in a knot. Dye the egg as usual, then remove the netting and leaf once it's done — a pale imprint in the shell's original colour will remain where the leaf was.
Melt a little beeswax and use a thin brush, a skewer or a pin head to draw dots, lines or geometric patterns on the shell. The wax repels the dye, so once the egg is dyed and dry, gently rub off the wax (or warm it briefly first and then wipe) and the pattern will remain in the shell's original colour. Layer the process — dye, wax, dye again in a darker shade — to create multicoloured designs.
Cut small shapes out of paper or card — circles, stars, hearts — and stick them onto the egg with water-soluble glue. Once the egg is dyed and dry, peel off the paper to reveal a pale shape underneath. Ordinary stickers or washi tape work just as well.
Want a streaky, wildly natural-looking pattern? Wrap the egg in dampened onion skins, tuck in a few herb leaves, then wrap the whole thing in a scrap of stocking or gauze tied tightly. Simmer the wrapped egg in the dye bath for 15 minutes. The skins will sit unevenly against the shell, creating a marbled effect in shades of orange and brown.
Colour flaking or sitting unevenly usually comes down to three things: a greasy shell, water that's too hot, or missing vinegar.
Degrease the shell: wipe it with vinegar or lemon before dyeing. Leftover grease or soap residue repels the dye and creates pale patches.
Watch the temperature: a hard, rolling boil can make the colour set unevenly. For the cold method, use a lukewarm to room-temperature bath.
Add vinegar and salt: vinegar stabilises the pH and improves how well the pigment sticks; salt helps dissolve the dye.
Hard-boil the egg properly: an undercooked shell is fragile, cracks easily, and the colour then settles unevenly.
The fix: gently wipe any flaking spot with a cloth dipped in vinegar water; this removes the lifted layer without damaging the rest of the colour.
Hard-boiled dyed eggs stay safe to eat in the fridge for roughly a week; don't leave them at room temperature for more than two hours. Cold slows spoilage and bacterial growth, so pop them back in the fridge as soon as possible after dyeing.
Store them steadily: a carton or egg stand stops the coloured surface from getting knocked or scratched.
Shine and protection: once the shells are dry, rub them gently with a drop of oil or butter; it adds shine and creates a barrier against drying out.
Check on them: toss out any egg that smells off or changes colour, so it doesn't spoil the rest.
Decorations that last for years: if you want to keep your dyed eggs permanently, dye blown-out eggs — with no contents inside, they won't spoil and will last until next Easter.

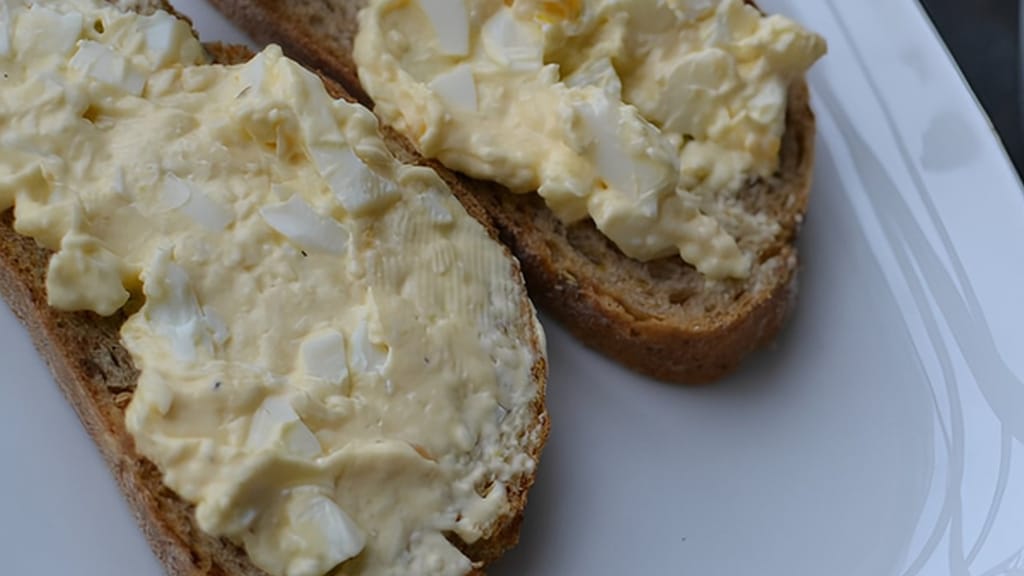
Boiled Easter eggs don't have to just be peeled and salted — the quickest way to use them up is egg spread. Just chop them up, mix with a bit of mayonnaise or yoghurt, and you've got a snack made from what would otherwise go to waste.
Craving more? Check out regional Easter specialities from the Czech Republic or discover how Easter and its food traditions are celebrated around the world.
Egg spread – easy and incredibly good
Easter egg spread made from boiled eggs – an easy recipe
Yes, but the colour stays darker and less clean-looking on brown shells. Natural shades really shine on white eggs; for brown ones, warm tones from onion skins or tea work better since they complement the brown base rather than fight it.
Beetroot's pigment (betalain) doesn't bond strongly to calcium-rich shells and breaks down with heat, so it usually only produces pastel tones. You'll get a deeper colour by using a lot of beetroot with very little water, adding vinegar, and letting the eggs soak in the cold dye bath overnight.
Lemon juice works as a 1:1 substitute — it also acidifies the bath and helps the colour bond to the shell. You can skip the acid altogether with strongly pigmented dyes like onion skins, but the result won't be as long-lasting.
Yes, and they'll last much longer once dyed. A blown egg floats, though, so you'll need to weigh it down or hold it under the surface in the dye bath, and use the cold method for a longer stretch of time until it reaches the shade you want.
Yes — you're dyeing them with everyday foods (onion, beetroot, turmeric, cabbage), so a hard-boiled egg dyed this way is perfectly fine to eat. Just follow the usual egg rules: keep them in the fridge and eat them within about a week.
One recipe worth heating the oven for, one tip, and one deal from the shop. Nothing else.